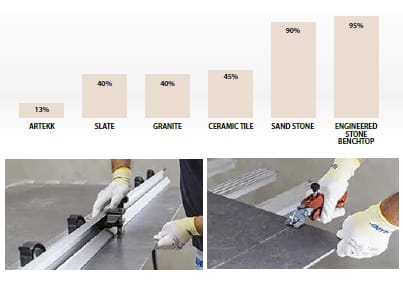
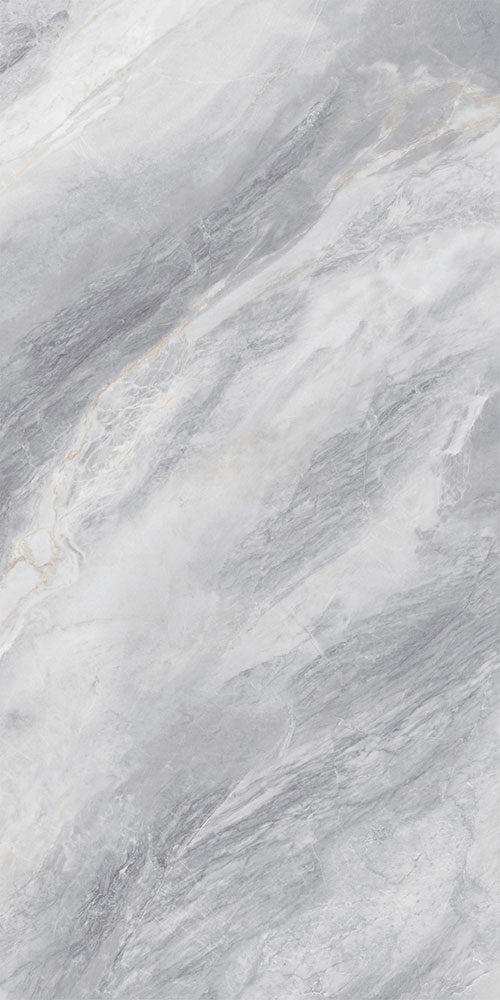
Porcelain Panels | 2700x1200x6mm | Peacocksque | Polished
* The listed price is for each piece *
# If you need any assistance, please contact our sales team.
# All product photo, colour and effect may differ slightly from how it appears on your screen due to varying monitor settings. if you would like to confirm before ordering, please order sample or visit our showroom.
Bluestone Pavers | 1200X600X30mm | Bluestone HN Rectangular | Sawn
* The listed price is per square (M2). *
# If you need any assistance, please contact our sales team.
# All product photo, colour and effect may differ slightly from how it appears on your screen due to varying monitor settings. if you would like to confirm before ordering, please order sample or visit our showroom.

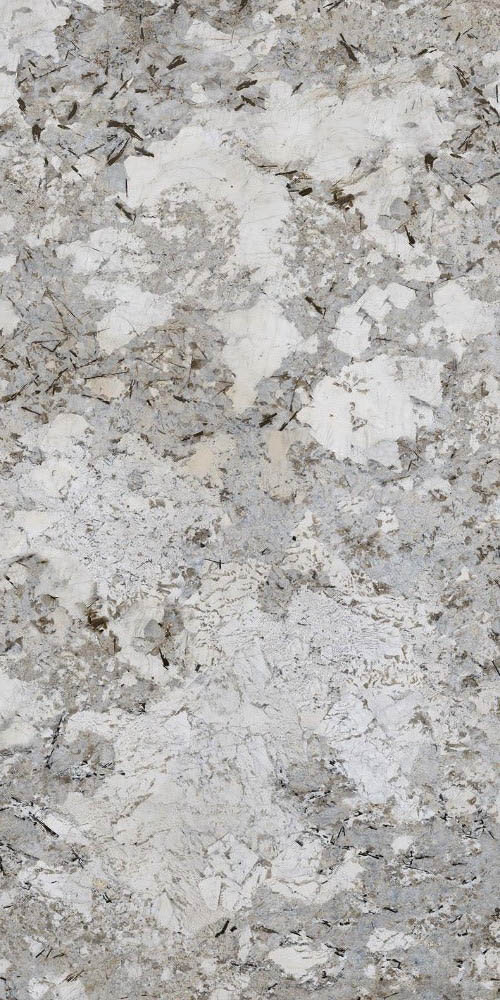
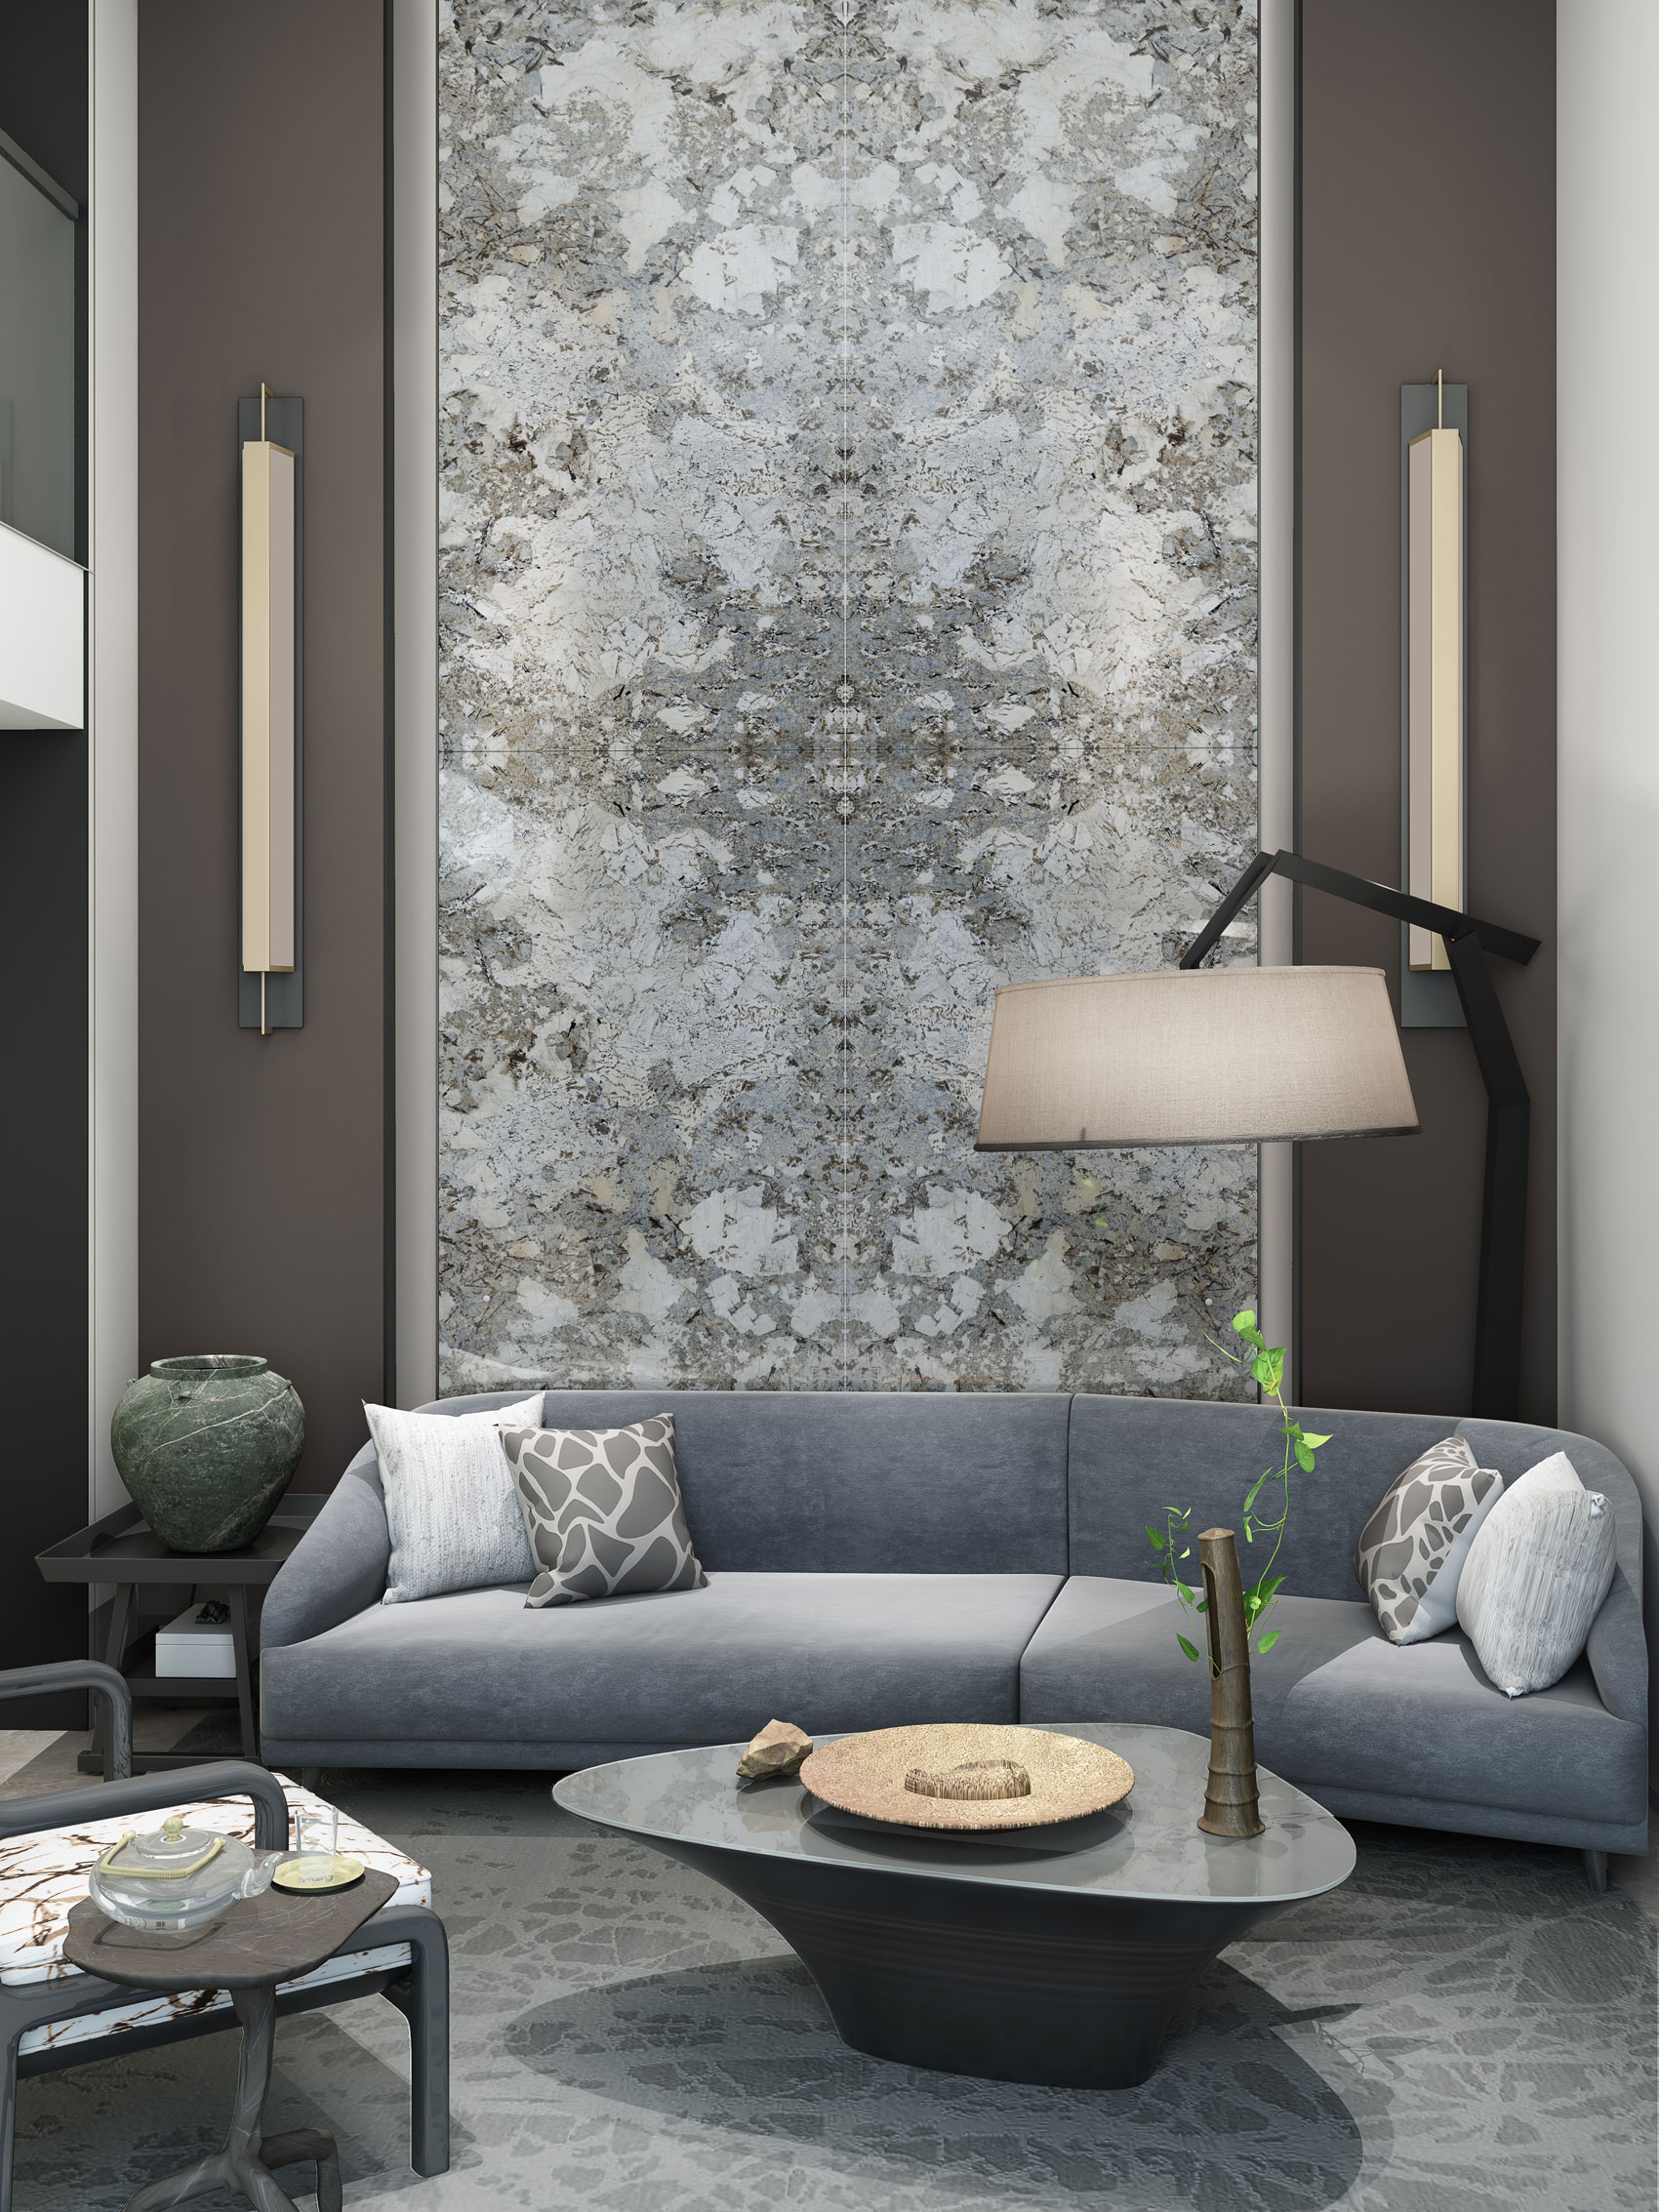
Porcelain Panels | 1800X900X5.5mm | Astral | Soft Polished
* The listed price is for each piece *
# If you need any assistance, please contact our sales team.
# All product photo, colour and effect may differ slightly from how it appears on your screen due to varying monitor settings. if you would like to confirm before ordering, please order sample or visit our showroom.
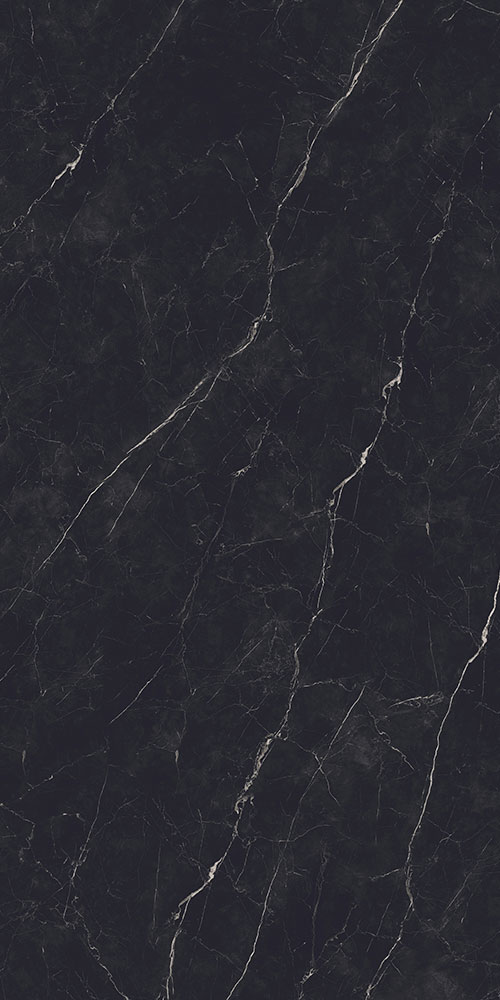
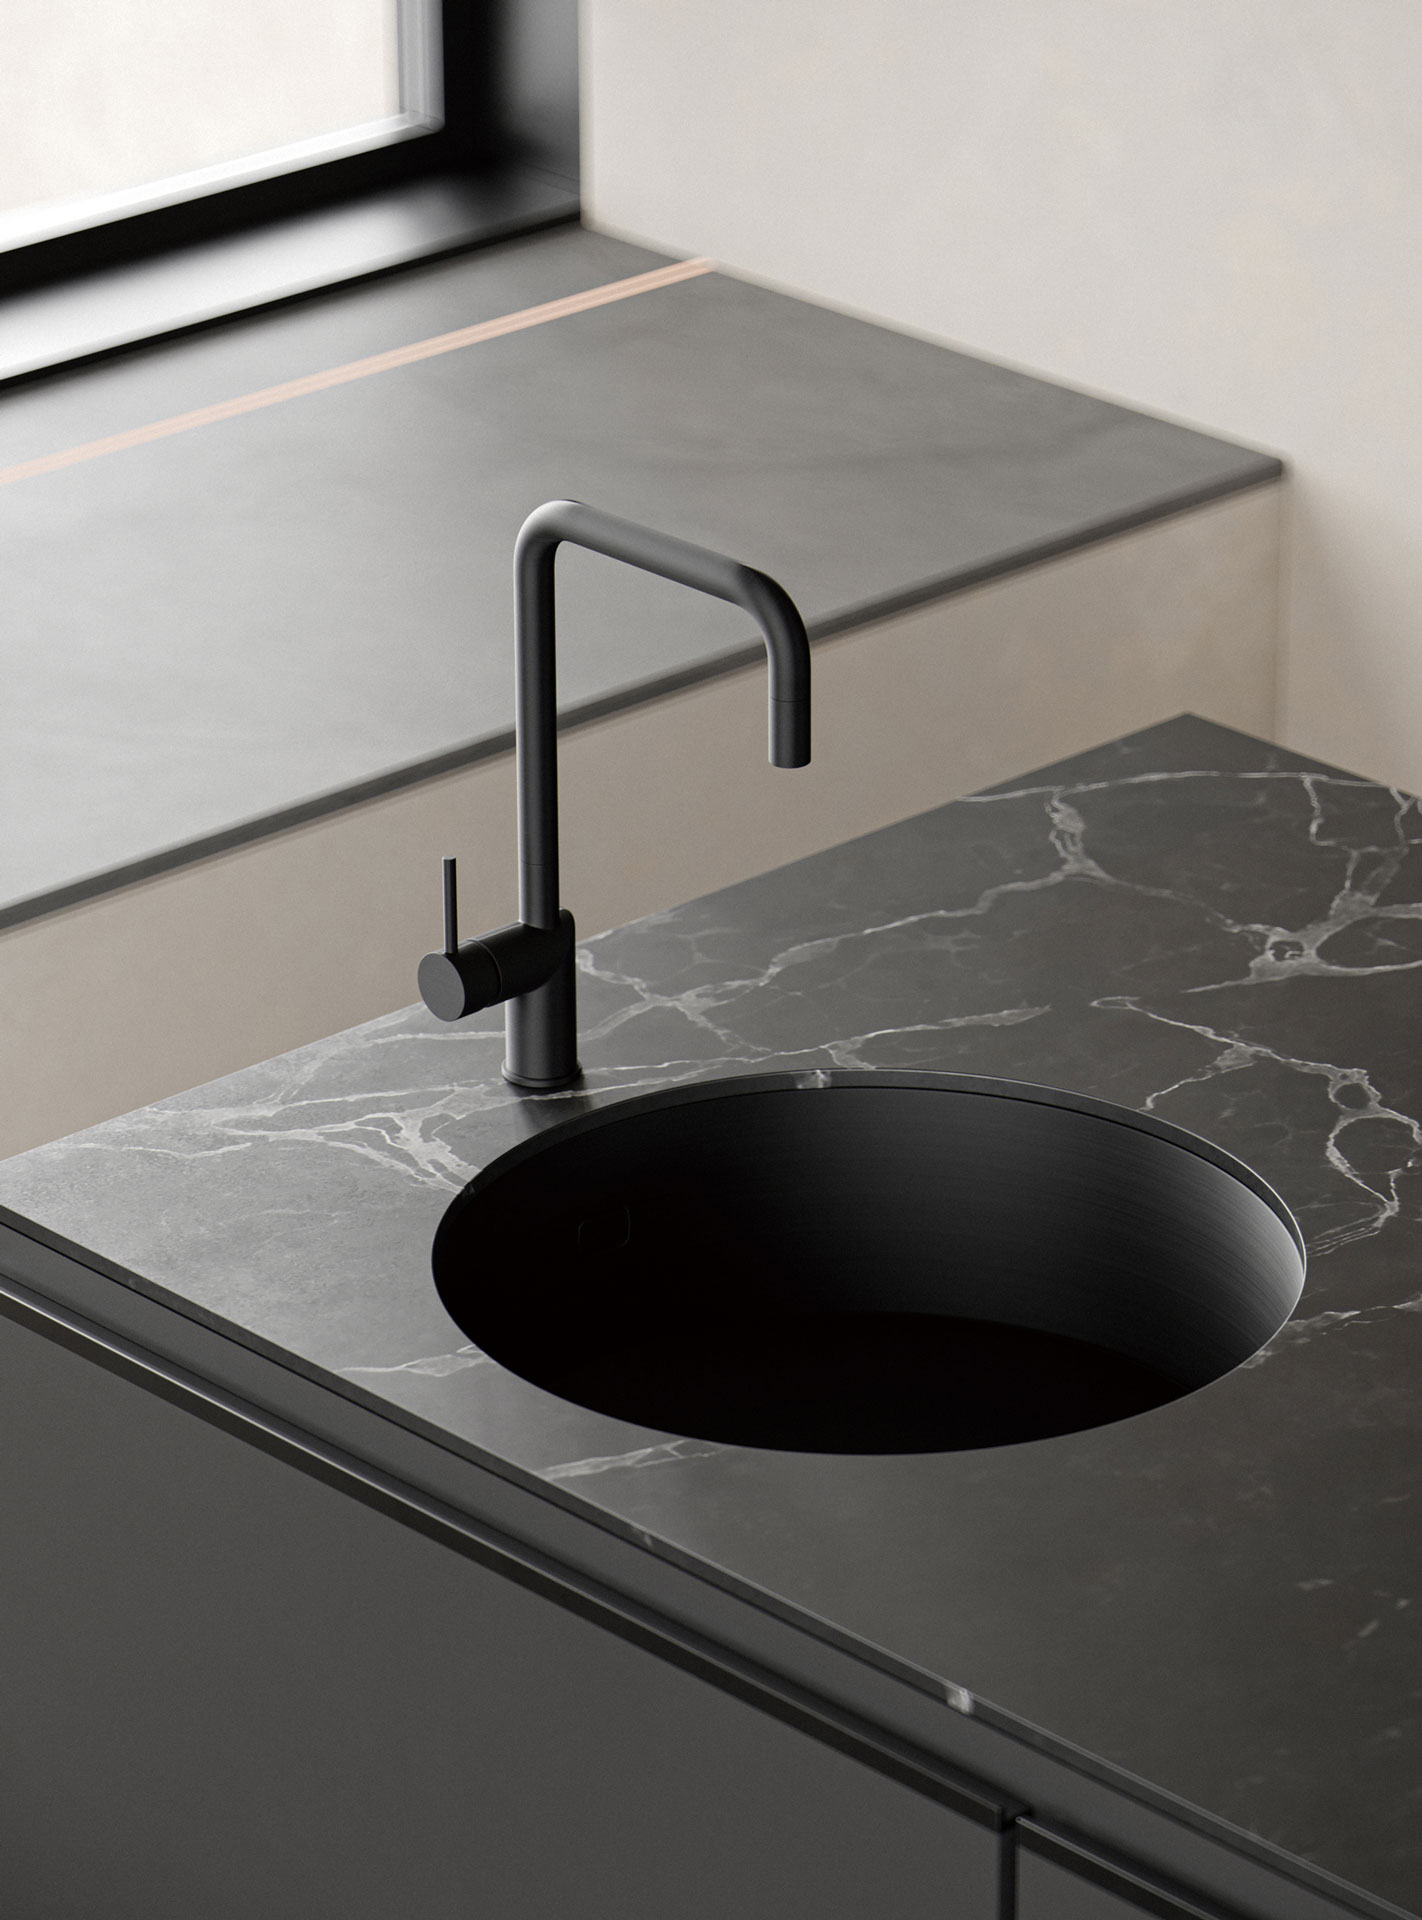
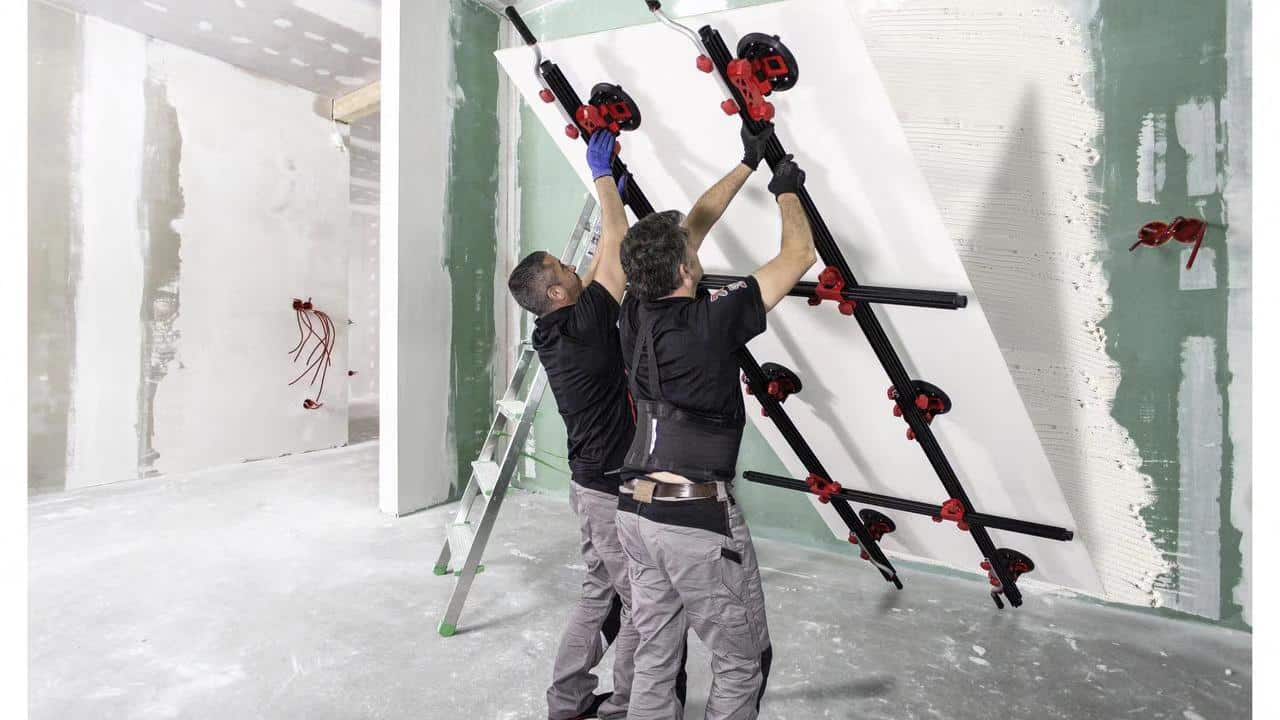
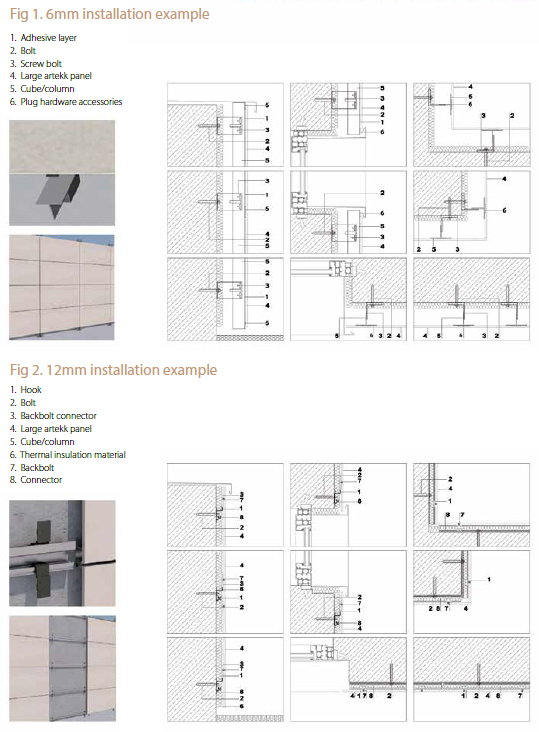
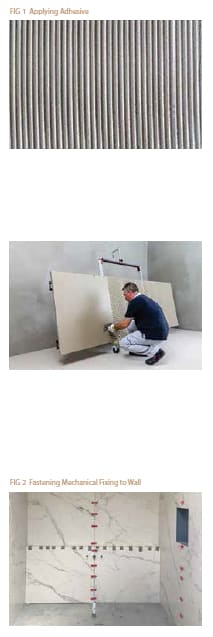
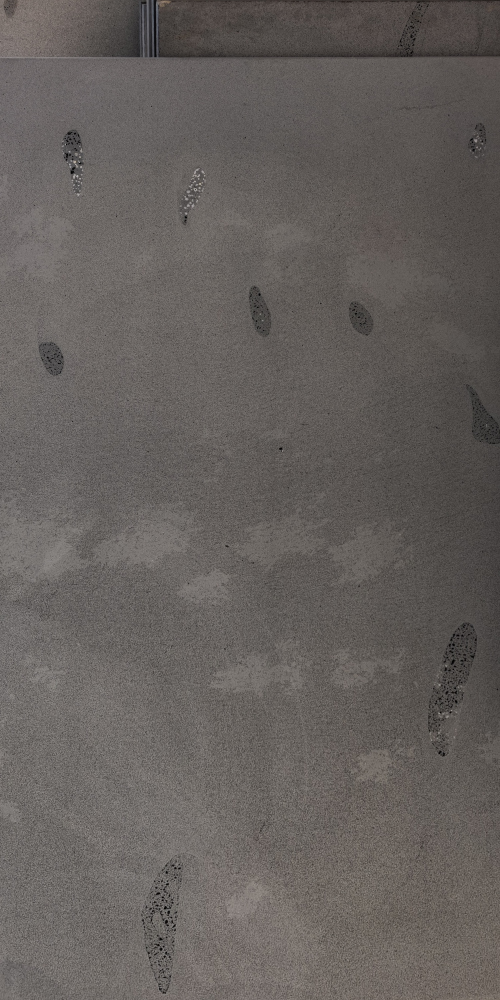
Porcelain Panels | 3200X1600X12mm | Shakes Black | Matt
* The listed price is for each piece *
# If you need any assistance, please contact our sales team.
# All product photo, colour and effect may differ slightly from how it appears on your screen due to varying monitor settings. if you would like to confirm before ordering, please order sample or visit our showroom.